Product Navigation
Quick UI guide to start using Pica Photometry System
Basics of the web UIOnce you have attached Pica Photometry System to your setup, you can use it with either PC or an Android device by connecting the USB cable to your device of choice (an OTG adapter may be needed for mobile devices).
To access the web ui please click this link.
Step one
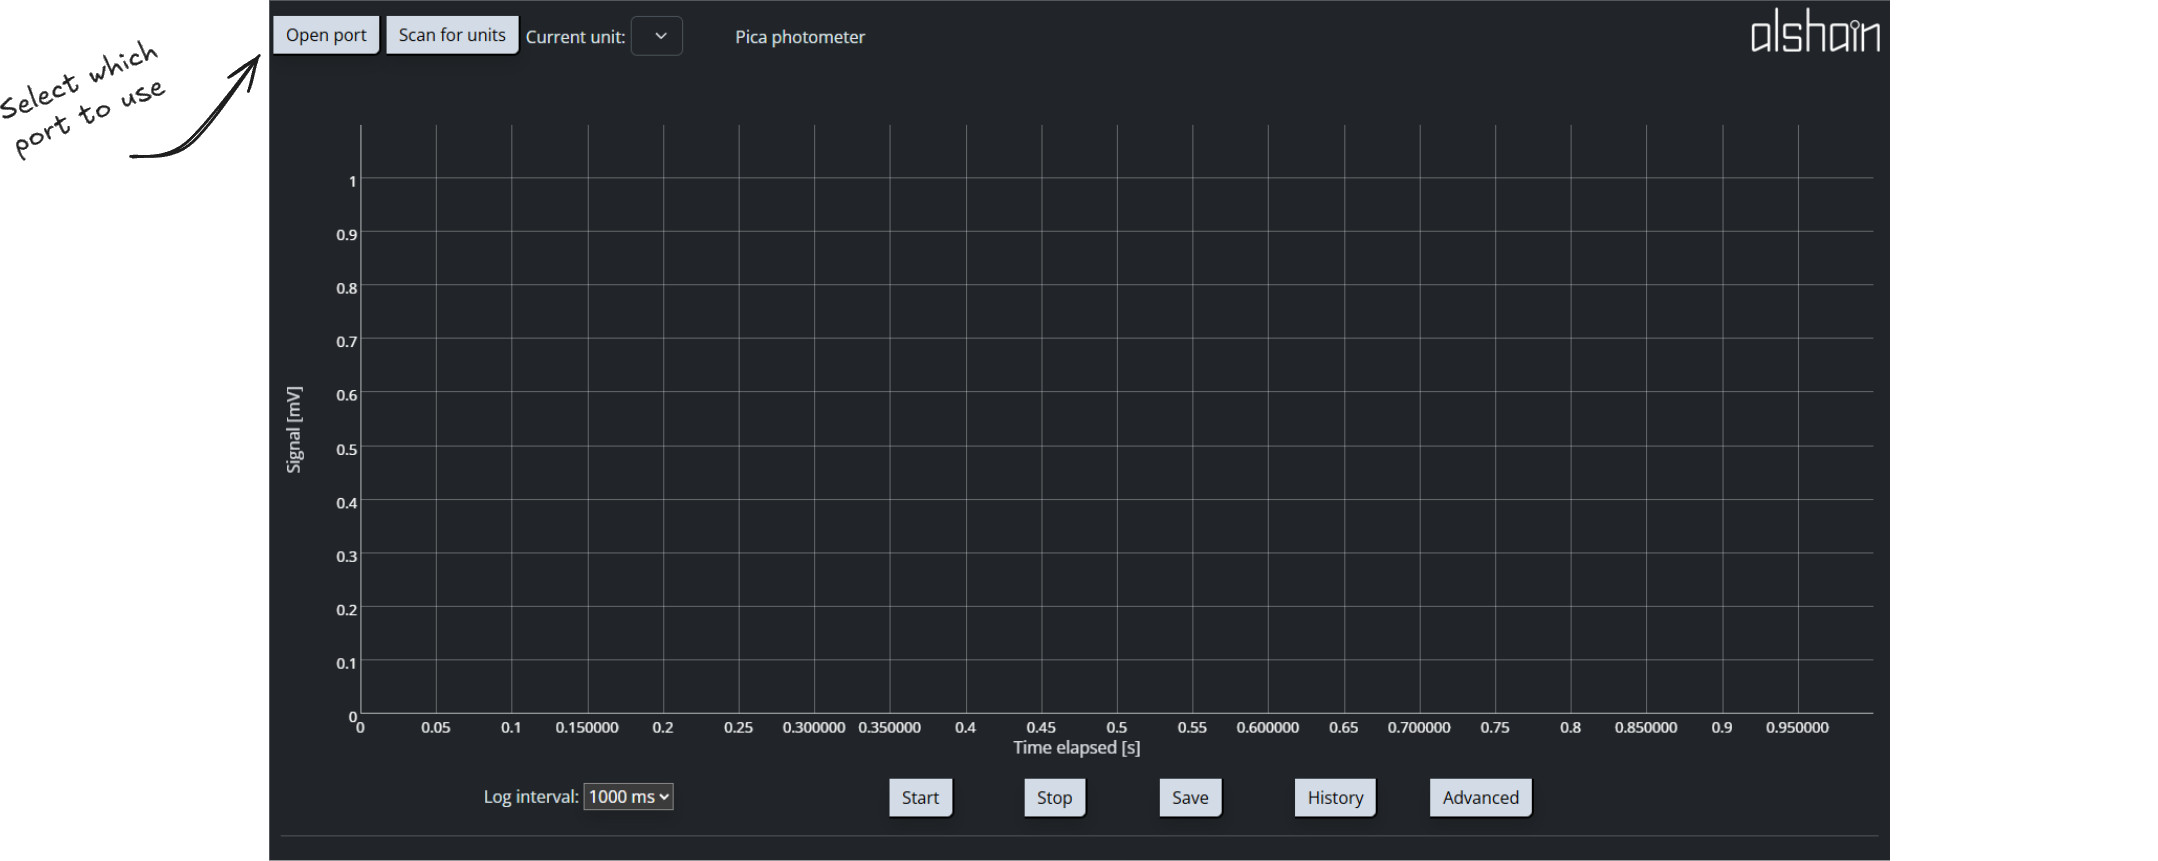
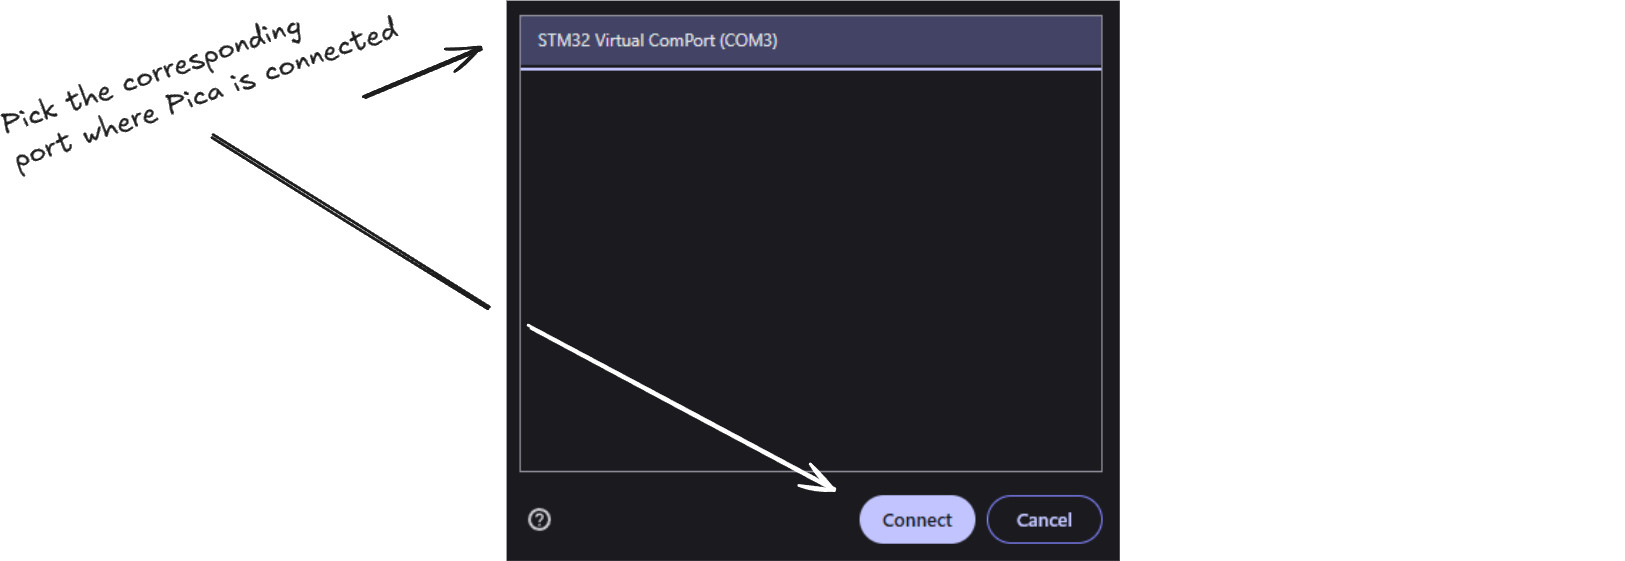
Connect to correct port
- Click the Open port button to display all available ports connected to your device
- Select the port where you connected Pica readout by clicking it
- Click the Connect button to proceed. When a connection is estabilished a checkmark will appear on the button
Note: on some Android devices, user has to enable USB OTG feature for this to work.
Step two
Find the device
- Click the Scan for units button, and the application will look for Pica devices on the bus
- After a check mark appears on the button and Current unit dropdown shows an id of a Pica readout unit you are good to go

Step three
Ready to measure
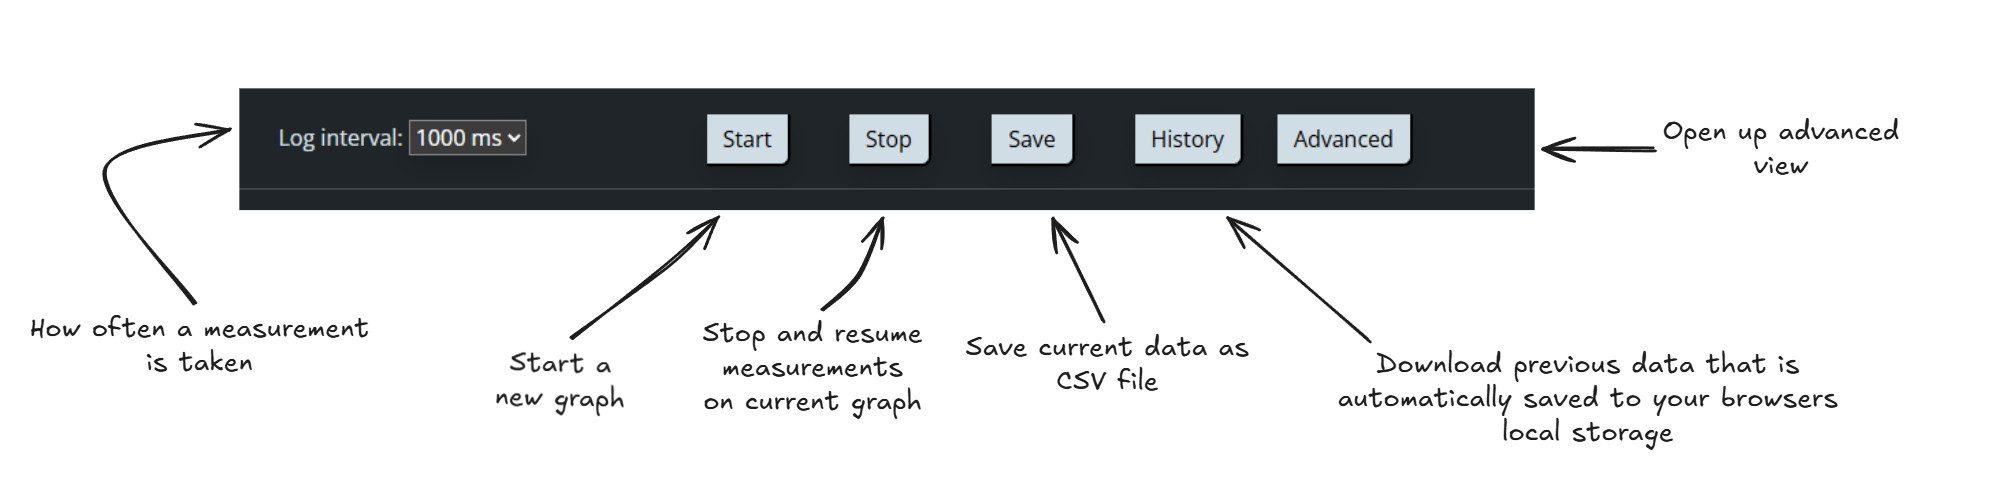
- Select desired log interval from the dropdown
- Press Start and the measurement process begins and graph will start to update live
Step four
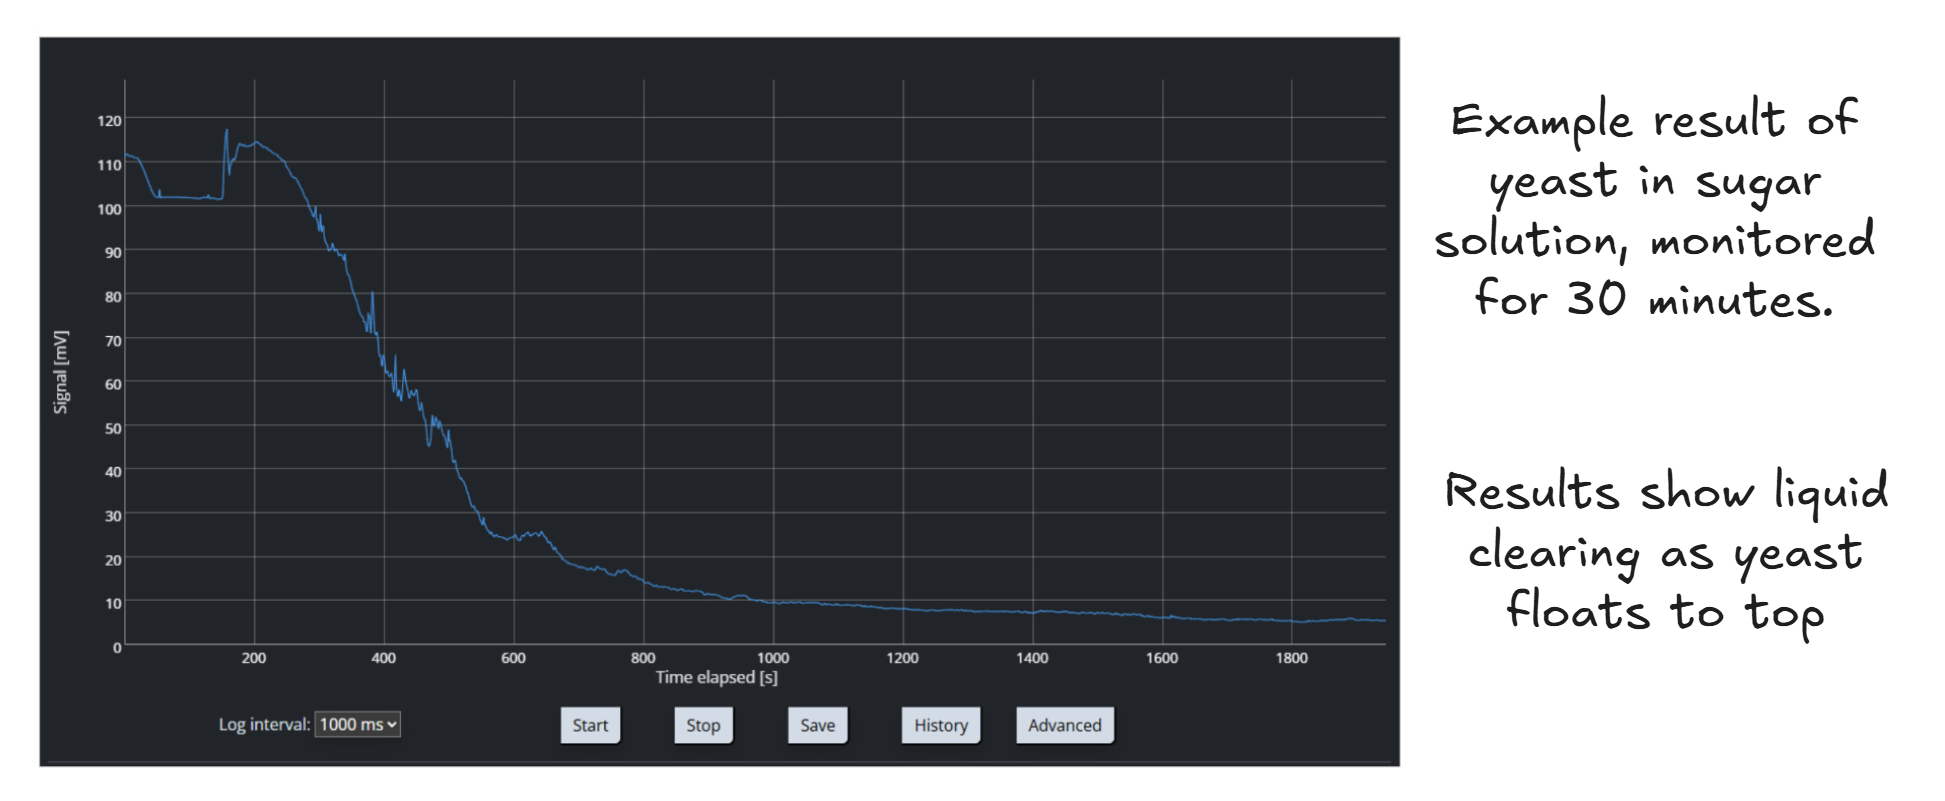
Observing the results
- Browser polls periodically results from the Pica Readout and logs them to graph.
- Click the Save button to save the current data on screen as a CSV file
- Results from previous measurement runs can be found by pressing History button.
- There are no guarantees how long the data is retained, it is saved to browser's local storage.